
🎨CRAFTS🎨 How To Make Halloween Devil Horn Hair Clips Tutorial
In the spirit of Halloween, I thought I’d make some cute devil horn hair clips. I made this years ago in college and now I want to bring into 2019.
I’m not too wild about costumes because they’re a waste of money for a one-time wear, so I usually put together Halloween-themed outfits to celebrate the spooky holiday. These hair clips were a hit and now I’m going to teach you how to make them. It’s easy, I promise!
Materials
Polymer clay
You can choose any color you like. For mine, I’m using red.

Red polymer clay.
Hair clips
They need to have a flat base so you can glue the horns on them.

Hair clips with a flat base for crafting.
Clay slicer
This is used to cut the clay smoothly and evenly.

Flat blade clay slicer.
Super glue
You'll use this to attach the horns to the hair clips.

Gorilla super glue.
Clay oven
As with any polymer clay project, you'll need an oven dedicated to baking clay.

Polymer clay oven.
Optional: Glossy varnish
After baking the horns, you can coat them with a varnish that gives them a glossy shine.

Polycrylic glossy varnish.
Instructions
Step 1
Take a good amount of clay for each horn and roll them into a ball. The size of the ball depends on how big you want your horns. For these, I’m doing 1 inch.

Polymer clay balls, 1 inch round.
Step 2
Once you have your ball, roll it into a cylinder. The length depends on how long you want your horns. I’m going to do 1 ½ inches.

Polymer clay rolled out to 1.5 inches.
Step 3
Take the edge of the cylinder and roll it into a point.

Polymer clay sharpened point on one end.
Step 4
Cut off the dull end so that you’re left with a straight horn.

Polymer clay cones.
Step 5
Curve the pieces so that the horns look more natural.

Polymer clay curved to look like horns.
Step 6
Bake the horns in the clay oven according to the instructions on the brand of clay you’re using. After baking, let them cool before proceeding to the next step.

Polymer clay horns baking in the oven.
Step 7
Once the horns are cooled off, position them on the hair clip depending on how you’ll wear them.
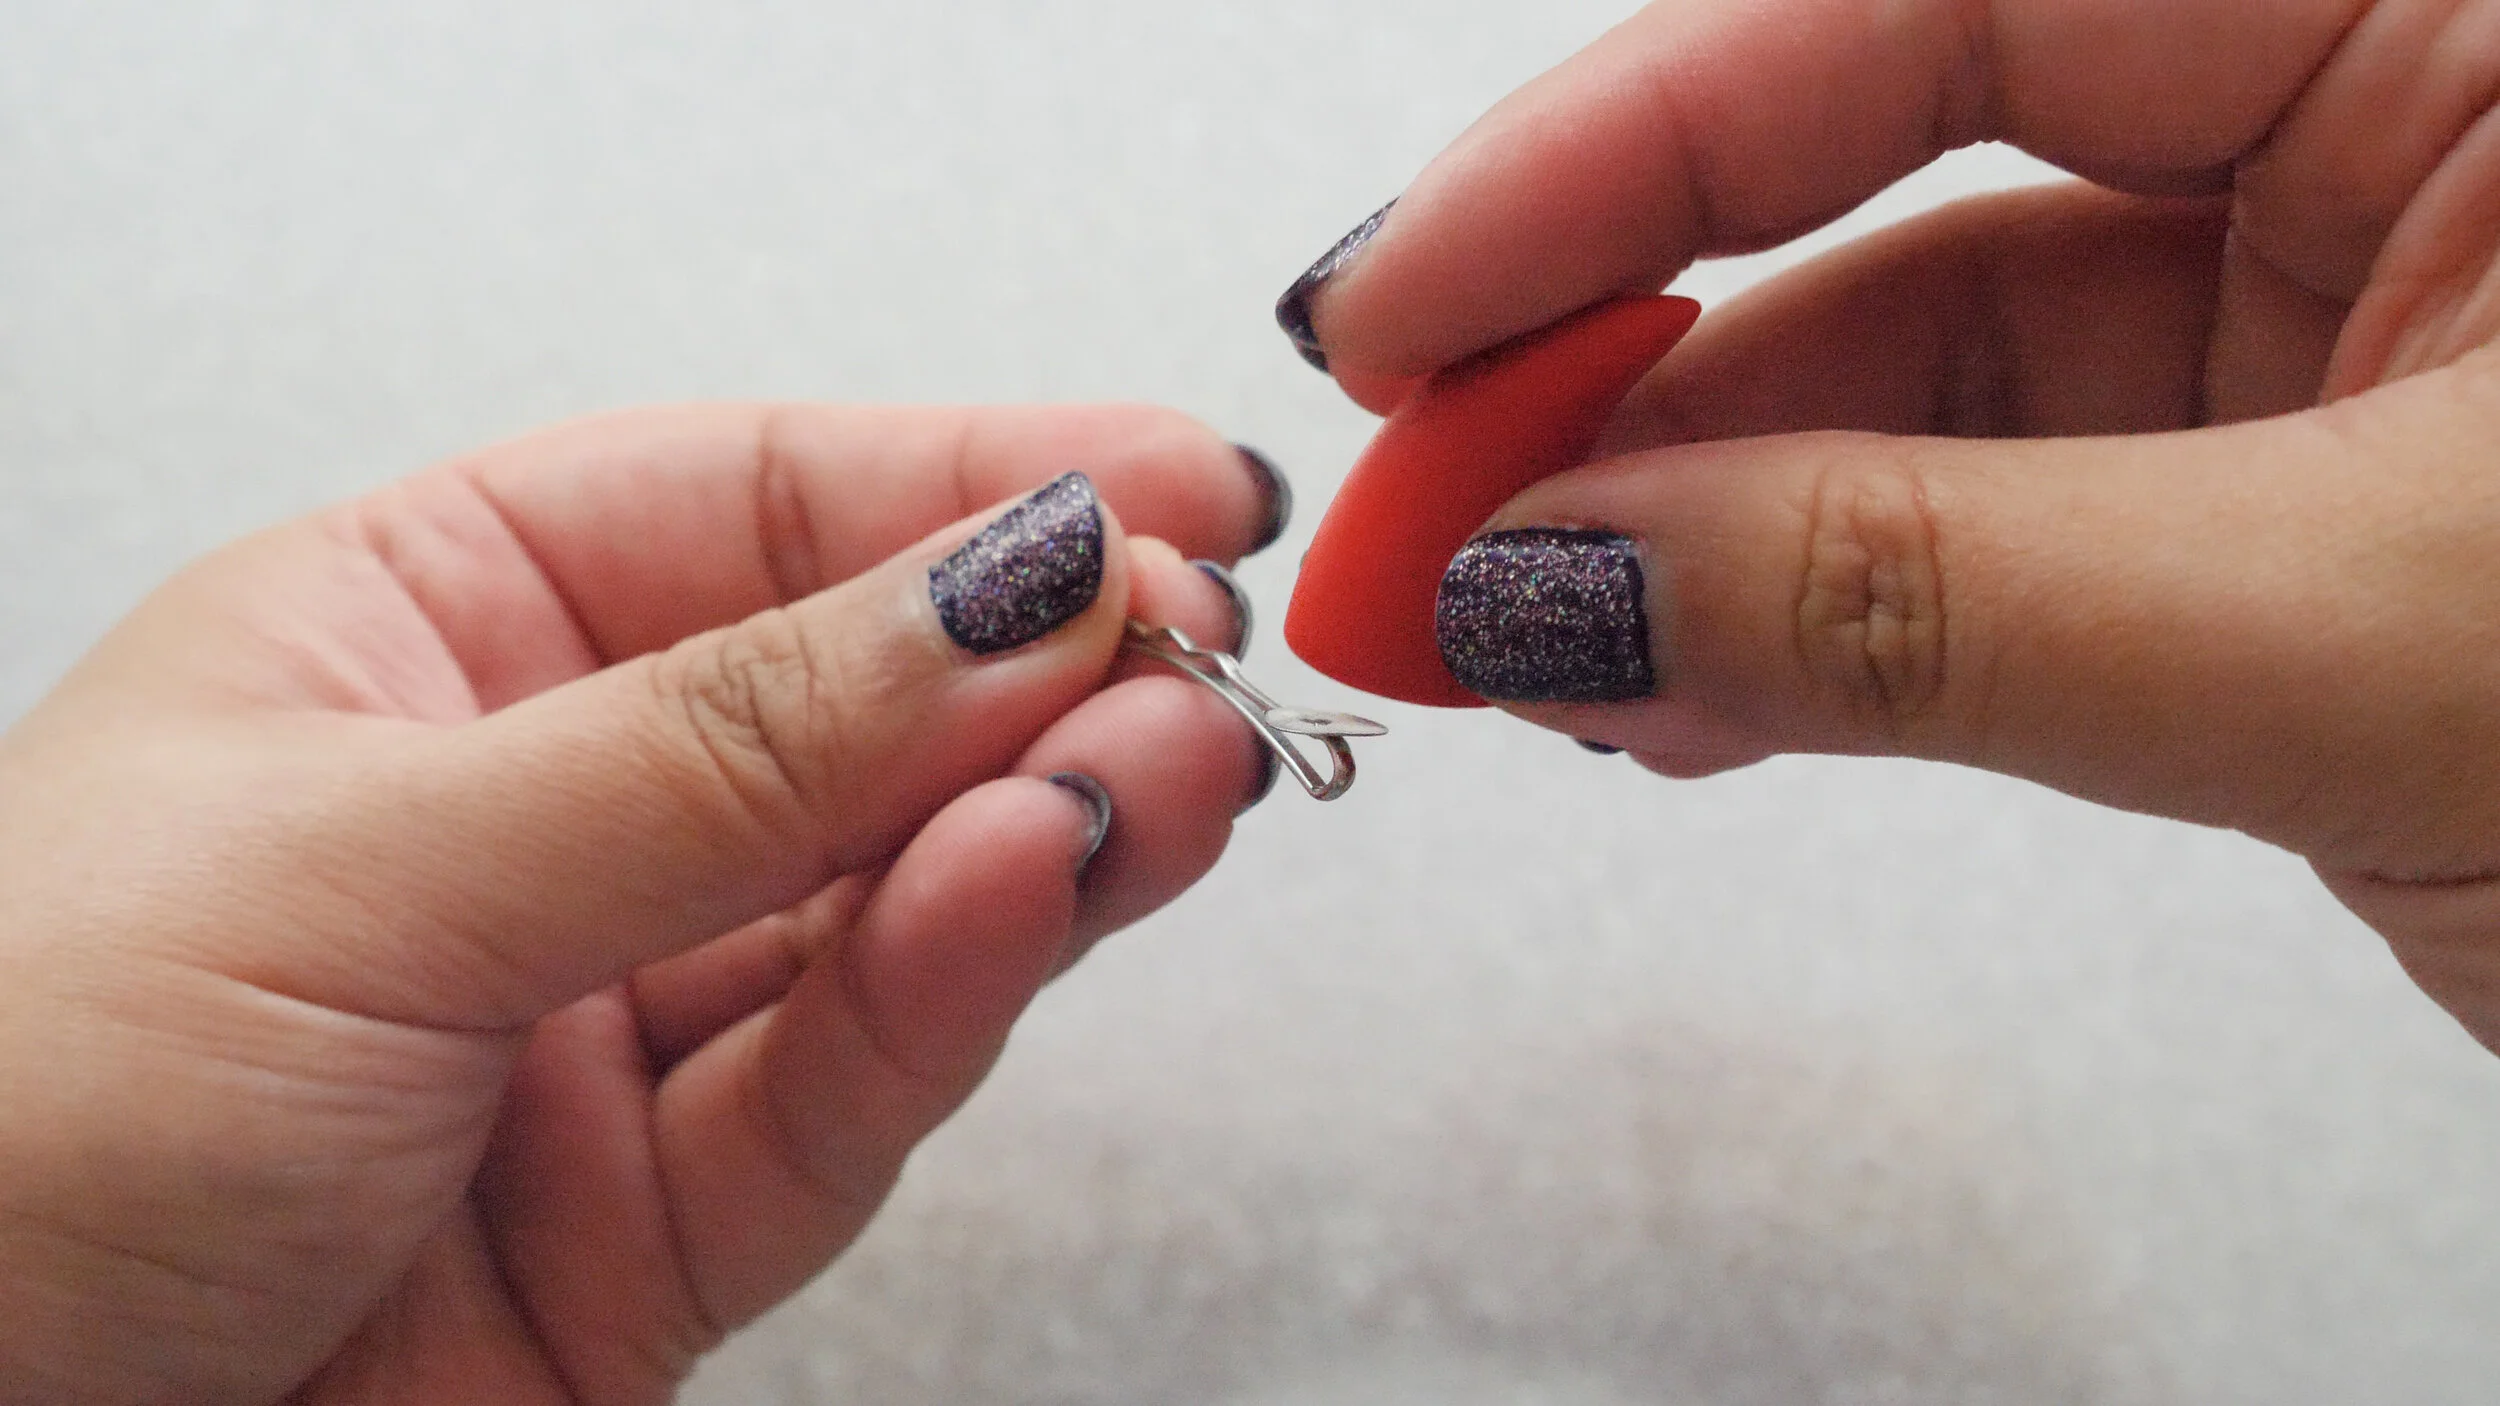
Positioning horn on the hair clip.
Step 8
Put a small amount of super glue on the hair clip and attach the horn to it. Wait a couple of minutes for the glue to dry.

A dab of super glue on the hair clip base.
Step 9: Optional
You can leave your horns like this, or you can add a shiny varnish. In my case, I want them to be shiny. Once the varnish dries, they’re ready to wear!

Finished devil horn hair clips (matte).

Finished devil horn hair clips (glossy).
Results
These are just too adorable. It’s a simple way to dress up for Halloween or you can wear these just for fun! You can even add glitter, paint patterns over it, and anything else your creativity comes up with.

Halloween devil horn hair clips, a simple addition to your outfit or costume!


